Why You’ll Love This Recipe
This recipe brings together two desserts—cheesecake and tacos—for the ultimate sweet fusion. It’s creamy, crunchy, and bursting with strawberry flavor. Plus, it’s a no-fuss dessert that looks impressively fancy but requires minimal effort. Each bite offers a mix of creamy filling, buttery crunch, and fruity sweetness, making it an irresistible crowd-pleaser for any occasion.
Print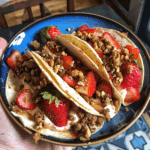
Strawberry Crunch Cheesecake Tacos: A Dessert You’ll Fall in Love With
- Total Time: 30 minutes
- Yield: 6 dessert tacos
- Diet: Vegetarian
Description
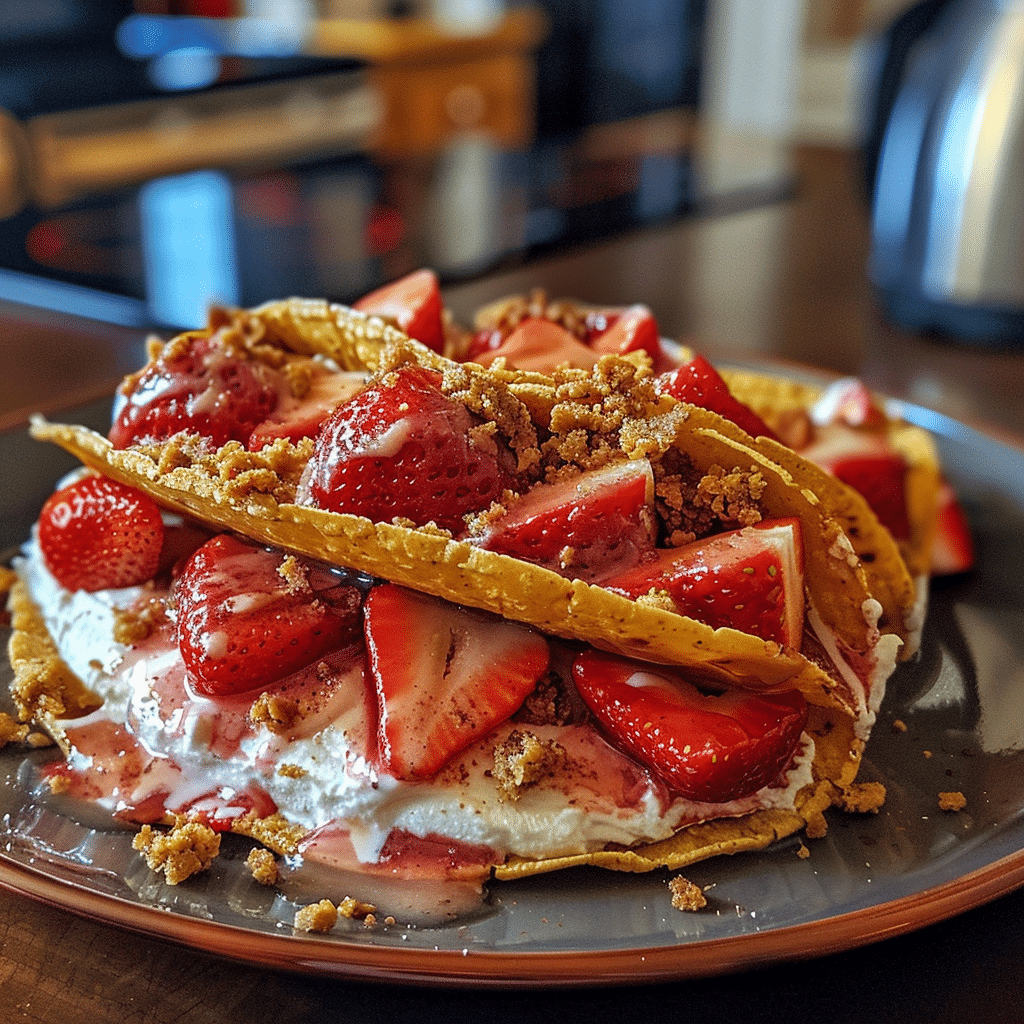
These Strawberry Crunch Cheesecake Tacos are a fun and indulgent dessert twist on classic tacos. Crispy cinnamon-sugar taco shells are filled with creamy cheesecake filling, topped with crushed strawberry crunch crumbles, and finished with fresh strawberries and whipped cream for a stunning treat.
Ingredients
- 6 small flour tortillas
- 2 tablespoons butter, melted
- 2 tablespoons sugar
- 1 teaspoon cinnamon
- 1 cup cream cheese, softened
- 1/2 cup powdered sugar
- 1 teaspoon vanilla extract
- 1/2 cup heavy whipping cream
- 1 cup freeze-dried strawberries, crushed
- 10 Golden Oreos, crushed
- 2 tablespoons melted butter (for crumble)
- 1 cup fresh strawberries, diced
- Whipped cream, for topping
Instructions
- Preheat oven to 375°F (190°C).
- Brush tortillas lightly with melted butter, then sprinkle with cinnamon sugar on both sides.
- Fold tortillas in half and hang them over the bars of an upside-down muffin tin to form taco shapes. Bake for 7–9 minutes or until golden and crisp. Let cool completely.
- In a mixing bowl, beat cream cheese, powdered sugar, and vanilla extract until smooth. In a separate bowl, whip heavy cream until stiff peaks form, then fold into the cream cheese mixture to create the cheesecake filling.
- In a bowl, mix crushed freeze-dried strawberries, Golden Oreo crumbs, and melted butter until combined and crumbly. This makes the strawberry crunch topping.
- Spoon or pipe the cheesecake filling into each cooled taco shell.
- Top with strawberry crunch mixture and diced fresh strawberries.
- Finish with a swirl of whipped cream and a few extra strawberry bits for garnish. Serve immediately or refrigerate until ready to serve.
Notes
- You can air-fry the tortilla shells at 350°F for 4–5 minutes instead of baking.
- For a shortcut, use store-bought strawberry crunch topping or crushed strawberry wafers.
- Keep refrigerated until serving to maintain crispness.
- Best enjoyed the same day for the crispiest texture.
- Prep Time: 20 minutes
- Cook Time: 10 minutes
- Category: Dessert
- Method: Baking
- Cuisine: American
Ingredients
(Tip: You can find the complete list of ingredients and their measurements in the recipe card below.)
Taco Shells
Use small flour tortillas for the shells. They’re easy to shape and fry or bake into crispy, golden taco shells. Coat them lightly with butter and sugar for a dessert-style twist.
Cream Cheese
Full-fat cream cheese gives the filling its classic cheesecake texture—smooth, rich, and creamy. Soften it at room temperature before mixing for the best results.
Heavy Whipping Cream
This adds lightness to the cheesecake filling and helps create that airy, mousse-like texture once whipped.
Powdered Sugar
Provides sweetness and helps thicken the cheesecake filling without a grainy texture.
Vanilla Extract
Adds a warm, aromatic depth to the filling and enhances the sweetness of the strawberries.
Strawberry Gelatin Mix (Jell-O)
The secret to that nostalgic strawberry crunch! It combines with crushed cookies to make a vibrant, flavorful topping.
Golden Oreos or Shortbread Cookies
Crush them into fine crumbs to mix with the strawberry gelatin powder and melted butter—creating that signature “crunch” topping.
Butter
Melted butter helps the strawberry cookie crumble mixture hold together and crisp up beautifully.
Fresh Strawberries
Add a burst of freshness and natural sweetness on top. Dice them small for easy taco assembly.
Sugar (for coating shells)
A sprinkle of granulated sugar on the shells adds sweetness and a light caramelized finish once baked or fried.
Directions
- Prepare the Taco Shells:
Preheat your oven to 375°F (190°C). Use small flour tortillas, cut into rounds if necessary. Brush each with melted butter, sprinkle with sugar, and drape over an oven-safe rack or taco mold to form the taco shape. Bake for 8–10 minutes until golden and crisp. Let cool completely. - Make the Strawberry Crunch Topping:
Crush Golden Oreos (or shortbread cookies) in a food processor until fine. In a bowl, mix with strawberry gelatin powder and melted butter. Stir until evenly coated, then spread on a baking sheet and bake at 350°F (175°C) for 5 minutes. Cool completely before using. - Prepare the Cheesecake Filling:
In a large bowl, beat softened cream cheese with powdered sugar and vanilla extract until smooth. In a separate bowl, whip heavy cream until stiff peaks form. Gently fold the whipped cream into the cream cheese mixture until fluffy and fully combined. - Assemble the Tacos:
Spoon or pipe the cheesecake filling into each cooled taco shell. Top with a generous sprinkle of the strawberry crunch and diced fresh strawberries. - Chill and Serve:
Refrigerate the filled tacos for at least 30 minutes before serving to let the flavors set and the filling firm up slightly. Serve chilled for the best texture and taste.
Essential Equipment
Must-Have Tools to Get Rolling
Here’s what you’ll want to have on hand:
Silicone Spatula – Durable, heat-resistant silicone spatula perfect for mixing, scraping, and spreading. Gentle on non-stick cookware and easy to clean.
Large pot – You’ll need this to boil the whole cabbage head and soften the leaves.
large bowl –Spacious, durable large bowl ideal for mixing, serving, or food preparation. Made from sturdy material and easy to clean.
Sharp knife – For coring the cabbage and slicing out the thick stem in each leaf. A paring knife works best.
Mixing bowl – A big bowl makes it easier to combine your meat and rice filling evenly.
Cutting board – For prepping cabbage leaves and rolling them like a pro.
9×13-inch baking dish – Ideal size to fit your rolled cabbage leaves snugly and prevent them from unraveling.
knife – A sharp, durable kitchen knife perfect for slicing, chopping, and dicing with ease.
Servings and timing
This recipe makes about 8–10 dessert tacos. Preparation takes 25 minutes, baking about 10 minutes, and chilling another 30 minutes. In just over an hour, you’ll have a show-stopping dessert ready to impress.
Storage/reheating
Store assembled tacos in the refrigerator for up to 2 days in an airtight container. To keep the shells crispy, store them separately and fill just before serving. The strawberry crunch topping can be kept at room temperature in a sealed jar for up to a week. Avoid reheating—these tacos are best served cold.
Variations and Customizations
Chocolate Strawberry Tacos
Dip the edges of the taco shells in melted chocolate before filling for an extra indulgent twist.
Blueberry Crunch Cheesecake Tacos
Swap strawberries and gelatin mix for blueberries and blueberry Jell-O for a fun flavor change.
No-Bake Version
Skip baking the shells and use ready-made mini waffle cones as taco shells for a faster, no-bake treat.
Vegan Strawberry Cheesecake Tacos
Use dairy-free cream cheese and coconut whipped cream for a vegan-friendly dessert.
Lemon Strawberry Tacos
Add lemon zest to the cheesecake filling for a bright, citrusy contrast to the sweetness of the strawberries.
FAQs
Can I make the taco shells ahead of time?
Yes, bake and store them in an airtight container for up to 3 days before filling.
What type of tortilla works best?
Small flour tortillas work best—they’re flexible and crisp beautifully when baked.
Can I fry the taco shells instead of baking?
Absolutely. Fry them in hot oil for 30–40 seconds per side, then coat with sugar while still warm.
Can I use store-bought strawberry crunch topping?
You can, but homemade gives fresher flavor and better texture.
How do I prevent soggy shells?
Cool the shells completely before filling and assemble just before serving.
Can I freeze the cheesecake filling?
Yes, the filling can be frozen for up to a month. Thaw in the refrigerator before using.
Can I use whipped topping instead of heavy cream?
Yes, whipped topping works fine and saves time, though it’s slightly sweeter.
What other fruits can I use?
Blueberries, raspberries, or diced peaches all work beautifully with the cheesecake filling.
How long should I chill the tacos before serving?
At least 30 minutes—this helps the filling firm up for easier handling.
What can I serve with these tacos?
They pair perfectly with coffee, vanilla ice cream, or a glass of cold milk for a nostalgic touch.
Conclusion
These Strawberry Crunch Cheesecake Tacos are the ultimate dessert hybrid—fun, colorful, and absolutely delicious. With their crispy shells, creamy cheesecake filling, and signature strawberry crunch, they bring excitement to every bite. Perfect for parties, holidays, or just because, this recipe delivers a stunning presentation and a nostalgic flavor that will have everyone asking for seconds. Once you try them, you’ll want to make them part of your dessert rotation all year round.
Looking for more tasty recipes? Visit our website for full details and follow us on Pinterest for daily food ideas to save and share