Why You’ll Love This Recipe
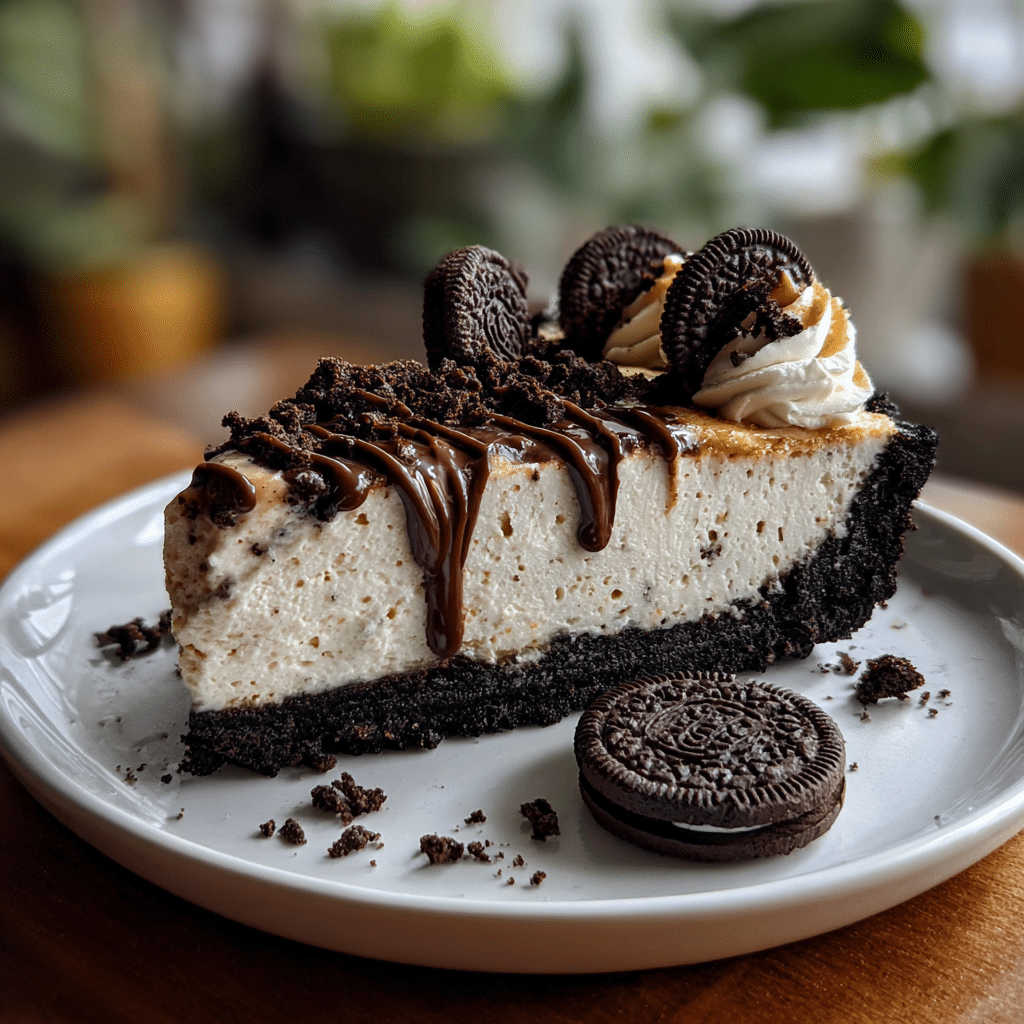
Oreo Peanut Butter Pie is the ultimate indulgence for anyone who loves the combination of creamy peanut butter and rich, chocolatey Oreo cookies. The dessert is a no-bake dream—making it quick and easy to prepare, yet it tastes like a decadent treat you’d find at a bakery. The Oreo crust is crunchy and chocolatey, the peanut butter filling is silky smooth, and the whipped topping adds the perfect light finish. I first made this pie when I wanted to impress guests without spending too much time in the kitchen, and it was a hit from the first bite! It’s rich, creamy, and bursting with the perfect balance of sweet and salty flavors. Perfect for parties, family gatherings, or as a special dessert for any occasion, this Oreo Peanut Butter Pie is guaranteed to satisfy your cravings.
Print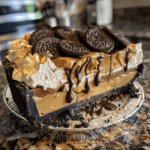
Oreo Peanut Butter Pie: A Rich, Decadent Dessert
- Total Time: 4 hours 20 minutes
- Yield: 8 servings
- Diet: Vegetarian
Description
Oreo Peanut Butter Pie is a no-bake dessert that combines the rich flavors of creamy peanut butter and smooth chocolate in a decadent, Oreo crust. Perfect for any special occasion or just as a treat for peanut butter and Oreo lovers.
Ingredients
[object Object]
Instructions
[object Object]
Notes
- If you prefer a smoother texture, you can melt the peanut butter slightly before mixing it with the cream cheese.
- For extra chocolate flavor, drizzle some melted chocolate over the top before serving.
- This pie can be made up to 2 days ahead of time, making it perfect for meal prep or holiday gatherings.
- Prep Time: 20 minutes
- Cook Time: 0 minutes
- Category: Dessert
- Method: No-bake
- Cuisine: American
Ingredients
(Tip: You can find the complete list of ingredients and their measurements in the recipe card below.)
For the Crust:
- Oreo cookies: The classic chocolatey base that gives the pie its signature crunch and chocolate flavor.
- Butter: Used to bind the crushed Oreos into a sturdy, delicious crust.
For the Peanut Butter Filling:
- Cream cheese: Adds a creamy, smooth texture to the filling.
- Peanut butter: The star of the pie, contributing a rich, nutty flavor.
- Powdered sugar: Sweetens the filling without making it grainy.
- Whipped topping (Cool Whip): Provides a light, airy texture that balances the richness of the filling.
For the Topping:
- More whipped topping: To finish off the pie with a light and fluffy top layer.
- Crushed Oreos: For garnish, adding an extra crunch and a pop of flavor.
Directions
For the Crust:
- Prepare the crust: In a food processor or blender, crush the Oreo cookies until they become fine crumbs. Alternatively, place them in a zip-top bag and crush with a rolling pin.
- Mix the crust: In a mixing bowl, combine the Oreo crumbs with melted butter, stirring until the mixture is evenly coated.
- Press into pan: Press the Oreo crumb mixture into the bottom of a 9-inch pie dish, making sure the crust is even and packed tightly.
- Chill the crust: Place the crust in the refrigerator while you prepare the filling to allow it to set.
For the Peanut Butter Filling:
- Mix the cream cheese: In a large mixing bowl, beat the cream cheese with an electric mixer until smooth and creamy.
- Add the peanut butter: Beat in the peanut butter until fully incorporated.
- Sweeten the mixture: Add powdered sugar and beat until smooth.
- Fold in whipped topping: Gently fold in the whipped topping (Cool Whip) until the mixture is smooth and fluffy.
- Fill the crust: Spoon the peanut butter filling into the chilled Oreo crust, spreading it evenly with a spatula.
For the Topping:
- Top the pie: Spread an additional layer of whipped topping over the peanut butter filling.
- Garnish: Sprinkle the top with crushed Oreos for a crunchy finish and a pop of extra flavor.
Chill:
- Refrigerate: Place the pie in the refrigerator for at least 4 hours, or preferably overnight, to allow the flavors to set and the pie to firm up.
- Serve: Slice and serve chilled. Enjoy the creamy, peanut-buttery goodness!
Equipment needed
Must-Have Tools to Get Rolling
Here’s what you’ll want to have on hand:
Silicone Spatula – Durable, heat-resistant silicone spatula perfect for mixing, scraping, and spreading. Gentle on non-stick cookware and easy to clean.
Large pot – You’ll need this to boil the whole cabbage head and soften the leaves.
large bowl –Spacious, durable large bowl ideal for mixing, serving, or food preparation. Made from sturdy material and easy to clean.
Sharp knife – For coring the cabbage and slicing out the thick stem in each leaf. A paring knife works best.
Mixing bowl – A big bowl makes it easier to combine your meat and rice filling evenly.
Cutting board – For prepping cabbage leaves and rolling them like a pro.
Full-Size Blender – is a powerful kitchen appliance for making smoothies, soups, and sauces in large batches.
3-in-1 Air Fryer – This versatile 3-in-1 air fryer offers Air Fry for healthier meals with less oil, Bake for bakery-quality desserts and treats, and Reheat to bring leftovers back to life with crispy, flavorful results
Servings and timing
This recipe serves 8 people.
Preparation time: 20 minutes
Chill time: 4 hours
Total time: 4 hours 20 minutes
Storage/reheating
Store the pie in an airtight container in the refrigerator for up to 4 days. This pie is best enjoyed chilled and does not need reheating. It also freezes well—just be sure to cover it tightly with plastic wrap or foil.

Variations and Customizations
- Chocolate drizzle: For an extra layer of indulgence, drizzle melted chocolate over the top of the whipped topping before serving.
- Nutty twist: Add crushed peanuts or chopped Reese’s peanut butter cups to the peanut butter filling for an added crunch.
- Peanut butter swirl: Swirl some extra peanut butter into the filling for a more intense peanut butter flavor throughout the pie.
- Different crust: If you’re not a fan of Oreos, you can use a graham cracker crust or a Nilla wafer crust for a different base.
- Dairy-free: To make this pie dairy-free, use a dairy-free whipped topping and vegan cream cheese.
Nutrition and Dietary Info
| Nutrient | Per Serving |
|---|---|
| Calories | 360 |
| Protein (g) | 5 |
| Carbs (g) | 35 |
| Fat (g) | 24 |
| Saturated Fat (g) | 9 |
| Fiber (g) | 2 |
| Sugar (g) | 21 |
| Sodium (mg) | 200 |
Expert Tips & Customizations
- Chill Time Is Key: Allow the pie to chill fully to let the filling set properly. If you’re in a rush, 4 hours is sufficient, but overnight is best for optimal texture.
- Crush the Oreos Well: The crust is a key element of this pie, so make sure the Oreo crumbs are fine and evenly mixed with butter for a solid base.
- Adjust Sweetness: If you like your pie a little less sweet, reduce the amount of powdered sugar in the filling by half.
FAQs
Can I make this ahead of time?
Yes, this pie is perfect for making ahead of time. It needs several hours to chill and firm up, making it an ideal make-ahead dessert for parties or gatherings.
Can I freeze this pie?
Yes! You can freeze the pie for up to a month. Just make sure to wrap it tightly in plastic wrap and foil. Thaw it in the fridge overnight before serving.
Can I use homemade whipped cream instead of Cool Whip?
Absolutely! You can substitute homemade whipped cream, though Cool Whip gives the pie a slightly lighter texture. Just ensure the whipped cream is stiff enough to hold up the filling.
How do I make the crust without a food processor?
If you don’t have a food processor, you can crush the Oreos in a zip-top bag using a rolling pin or put them in a bowl and crush them with the back of a spoon.
Can I use a different type of nut butter?
Yes, you can substitute peanut butter with almond butter or cashew butter for a different flavor profile, but the taste will be different from the classic peanut butter pie.
Conclusion
Oreo Peanut Butter Pie is a rich and indulgent dessert that combines the best of chocolate, peanut butter, and Oreo cookies. With its creamy, silky filling and crunchy Oreo crust, it’s sure to be a favorite at any gathering. Whether you’re serving it at a party or enjoying it as a special treat, this no-bake pie will satisfy any sweet tooth.
Hungry for more? Visit our website for full recipes and follow us on Pinterest for daily foodie inspo you’ll love to pin!