Why You’ll Love This Recipe
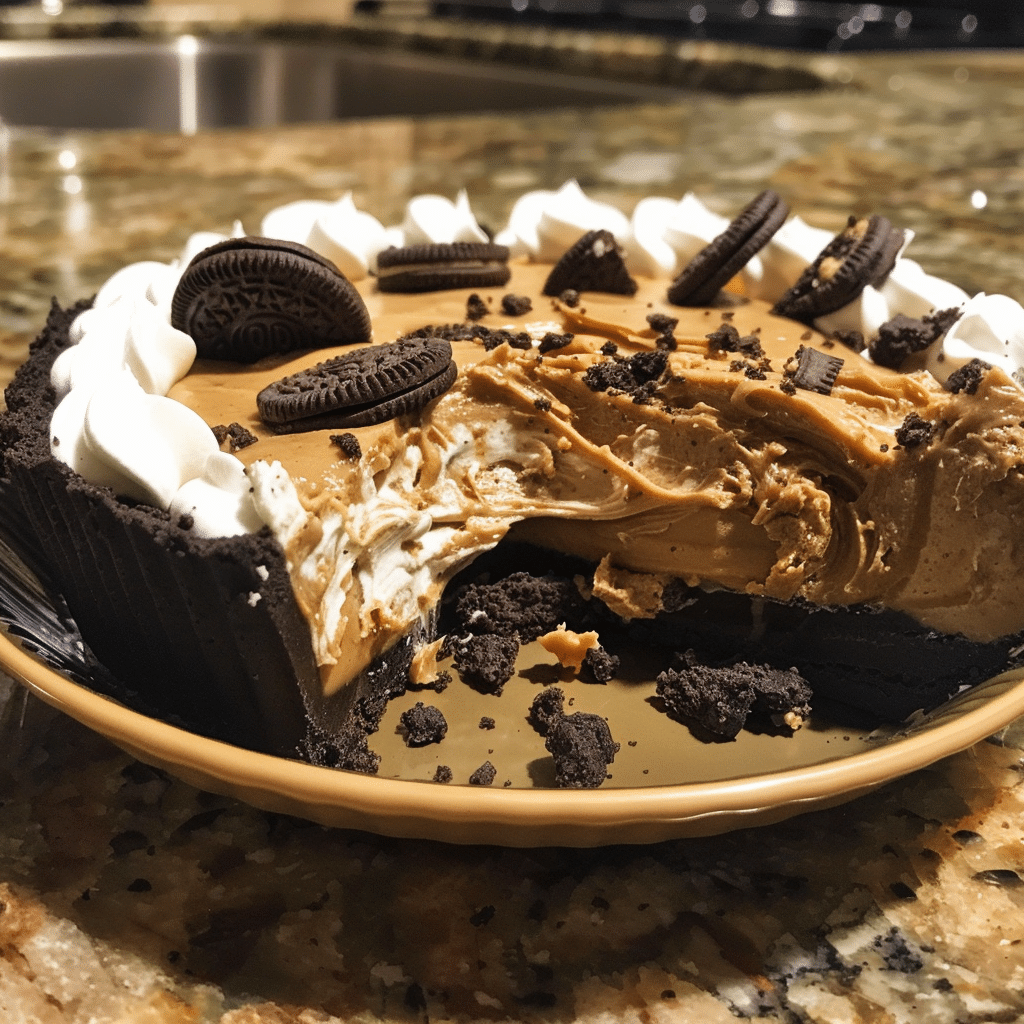
Unbelievable Peanut Butter Pie with Oreo Crust is a dessert that lives up to its name — unbelievably simple, unbelievably creamy, and unbelievably delicious. The combination of a chocolatey Oreo crust and a silky peanut butter filling creates a flavor pairing that’s pure indulgence. It’s a no-bake pie that requires minimal effort but tastes like something straight out of a bakery. I once made this for a potluck and added chopped peanut butter cups on top — not a single slice was left. Whether you’re a chocolate lover, a peanut butter fanatic, or just craving something decadent, this pie is a guaranteed crowd-pleaser.
Print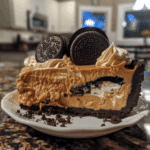
Unbelievable Peanut Butter Pie with Oreo Crust: Creamy, Dreamy, and Decadent
- Total Time: 15 mins (plus chilling time)
- Yield: 8 servings
- Diet: Vegetarian
Description
This Unbelievable Peanut Butter Pie with Oreo Crust is a creamy, dreamy, no-bake dessert that combines a rich peanut butter filling with a crunchy Oreo cookie crust — indulgent, silky, and irresistibly easy to make!
Ingredients
- 24 Oreo cookies
- 1/4 cup unsalted butter, melted
- 1 cup creamy peanut butter
- 225g (8 oz) cream cheese, softened
- 1 cup powdered sugar
- 1 teaspoon vanilla extract
- 1 1/2 cups heavy whipping cream (or whipped topping)
- Chocolate ganache or hot fudge sauce, for topping (optional)
- Crushed peanuts or Oreo crumbs, for garnish
Instructions
- In a food processor, crush the Oreo cookies until fine crumbs form. Add melted butter and pulse until evenly combined.
- Press the crumb mixture firmly into the bottom and sides of a 9-inch pie dish. Chill in the refrigerator while preparing the filling.
- In a large bowl, beat cream cheese and peanut butter together until smooth and creamy.
- Add powdered sugar and vanilla extract, mixing until fully incorporated.
- In a separate bowl, whip the heavy cream until stiff peaks form (or use whipped topping for a shortcut).
- Fold the whipped cream gently into the peanut butter mixture until smooth and fluffy.
- Spread the filling evenly over the chilled Oreo crust and smooth the top with a spatula.
- Refrigerate for at least 4 hours, or overnight, until set.
- Before serving, drizzle with chocolate ganache or fudge sauce and sprinkle with crushed peanuts or Oreo crumbs.
Notes
- Use crunchy peanut butter for added texture.
- For a chocolate-peanut butter twist, add 1 tablespoon of cocoa powder to the filling.
- This pie freezes beautifully — thaw in the fridge for 30 minutes before serving.
- Prep Time: 15 mins
- Cook Time: 0 mins
- Category: Dessert
- Method: No-bake
- Cuisine: American
Ingredients
(Tip: You can find the complete list of ingredients and their measurements in the recipe card below.)
For the Oreo Crust
Oreo cookies – Crushed into fine crumbs to form the perfect rich, chocolatey base.
Butter – Melted to bind the cookie crumbs together and add buttery depth.
For the Peanut Butter Filling
Cream cheese – Softened to create a smooth and tangy base for the creamy filling.
Creamy peanut butter – The hero of the pie, giving it rich, nutty flavor.
Powdered sugar – Sweetens the filling and adds a velvety consistency.
Vanilla extract – Enhances the peanut butter flavor with warm undertones.
Heavy whipping cream (or Cool Whip) – Whipped until fluffy to make the filling light, airy, and mousse-like.
For Topping
Whipped cream – Adds a cool, light finish that balances the richness.
Chocolate syrup or ganache – For drizzling and extra indulgence.
Chopped peanuts or peanut butter cups – Optional garnish for crunch and texture.
Directions
Begin by making the crust. Crush the Oreo cookies (cream filling included) into fine crumbs using a food processor or by sealing them in a plastic bag and crushing with a rolling pin. Mix the crumbs with melted butter until fully coated and sandy in texture. Press the mixture firmly into the bottom and sides of a 9-inch pie pan. Chill in the refrigerator for at least 20 minutes while preparing the filling.
For the filling, beat the softened cream cheese and peanut butter together in a large bowl until smooth and creamy. Add powdered sugar and vanilla extract, mixing until fully combined.
In a separate bowl, whip the heavy cream until stiff peaks form. Gently fold the whipped cream into the peanut butter mixture until no streaks remain. Be sure to fold — not beat — to maintain that light and fluffy texture.
Spoon the filling into the chilled Oreo crust and smooth the top with a spatula. Cover and refrigerate for at least 4 hours, or overnight for the best texture and flavor.
Just before serving, top with a generous layer of whipped cream, drizzle with chocolate syrup or ganache, and garnish with chopped peanuts or peanut butter cups. Slice and serve chilled for the ultimate creamy, chocolate-peanut butter indulgence.
Essential Equipment
Must-Have Tools to Get Rolling
Here’s what you’ll want to have on hand:
Silicone Spatula – Durable, heat-resistant silicone spatula perfect for mixing, scraping, and spreading. Gentle on non-stick cookware and easy to clean.
Large pot – You’ll need this to boil the whole cabbage head and soften the leaves.
large bowl –Spacious, durable large bowl ideal for mixing, serving, or food preparation. Made from sturdy material and easy to clean.
Sharp knife – For coring the cabbage and slicing out the thick stem in each leaf. A paring knife works best.
Mixing bowl – A big bowl makes it easier to combine your meat and rice filling evenly.
Cutting board – For prepping cabbage leaves and rolling them like a pro.
9×13-inch baking dish – Ideal size to fit your rolled cabbage leaves snugly and prevent them from unraveling.
knife – A sharp, durable kitchen knife perfect for slicing, chopping, and dicing with ease.
Servings and timing
This recipe serves 8–10 people. Preparation takes about 20 minutes, plus at least 4 hours of chilling time (overnight is ideal). Total time: approximately 4 hours and 20 minutes.
Storage/reheating
Store covered in the refrigerator for up to 5 days. For longer storage, freeze the pie (without whipped cream topping) for up to 2 months. Thaw overnight in the refrigerator before serving. Serve chilled — no reheating needed.
Variations and Customizations
Chocolate Peanut Butter Pie – Add 2 tablespoons of cocoa powder or a thin layer of chocolate ganache between the crust and filling.
Salted Caramel Peanut Butter Pie – Drizzle salted caramel between layers or on top for sweet-salty perfection.
Oreo Peanut Butter Cup Pie – Fold chopped Reese’s cups into the filling for texture and double the peanut butter flavor.
Peanut Butter Nutella Pie – Swirl in Nutella before chilling for a chocolate-hazelnut twist.
Frozen Peanut Butter Pie – Freeze fully and serve as an ice cream-style dessert on hot days.
Mini Peanut Butter Pies – Portion the crust and filling into cupcake liners for adorable, individual servings.
Crunchy Peanut Butter Pie – Use crunchy peanut butter for added texture.
Peanut Butter Pretzel Pie – Mix crushed pretzels into the crust for a salty contrast.
Mocha Peanut Butter Pie – Add a teaspoon of espresso powder to the filling for a subtle coffee note.
Vegan Peanut Butter Pie – Use dairy-free cream cheese, coconut whipped cream, and vegan chocolate cookies for the crust.
FAQs
Can I use store-bought Oreo crust?
Yes, it works perfectly if you want to save time.
Can I make this ahead of time?
Absolutely — it’s even better the next day after chilling overnight.
Can I use natural peanut butter?
You can, but stir it thoroughly and ensure it’s not too oily, as that can affect the texture.
Can I use Cool Whip instead of whipped cream?
Yes, use about 8 ounces of Cool Whip in place of the whipped cream.
Can I freeze the pie?
Yes, it freezes beautifully and can even be served semi-frozen for a firmer, ice cream-like texture.
What’s the best way to get clean slices?
Dip your knife in hot water and wipe it clean between each slice.
Can I use another cookie for the crust?
Yes, chocolate graham crackers or Biscoff cookies also work wonderfully.
Can I skip the cream cheese?
You can substitute mascarpone for a milder flavor, though the texture may be slightly softer.
How do I make it less sweet?
Reduce the powdered sugar slightly and use dark chocolate drizzle instead of milk chocolate.
Can I make it gluten-free?
Yes, simply use gluten-free chocolate sandwich cookies for the crust.
Conclusion
Unbelievable Peanut Butter Pie with Oreo Crust is a true showstopper — creamy, rich, and loaded with that irresistible peanut butter-chocolate combo. Every layer offers something to love, from the buttery crunch of the Oreo crust to the silky-smooth peanut butter filling. It’s simple enough for a weeknight treat yet decadent enough for holidays and special occasions. Once you take that first bite, you’ll understand why it’s called unbelievable — this pie is dessert perfection in every sense.
Looking for more tasty recipes? Visit our website for full details and follow us on Pinterest for daily food ideas to save and share